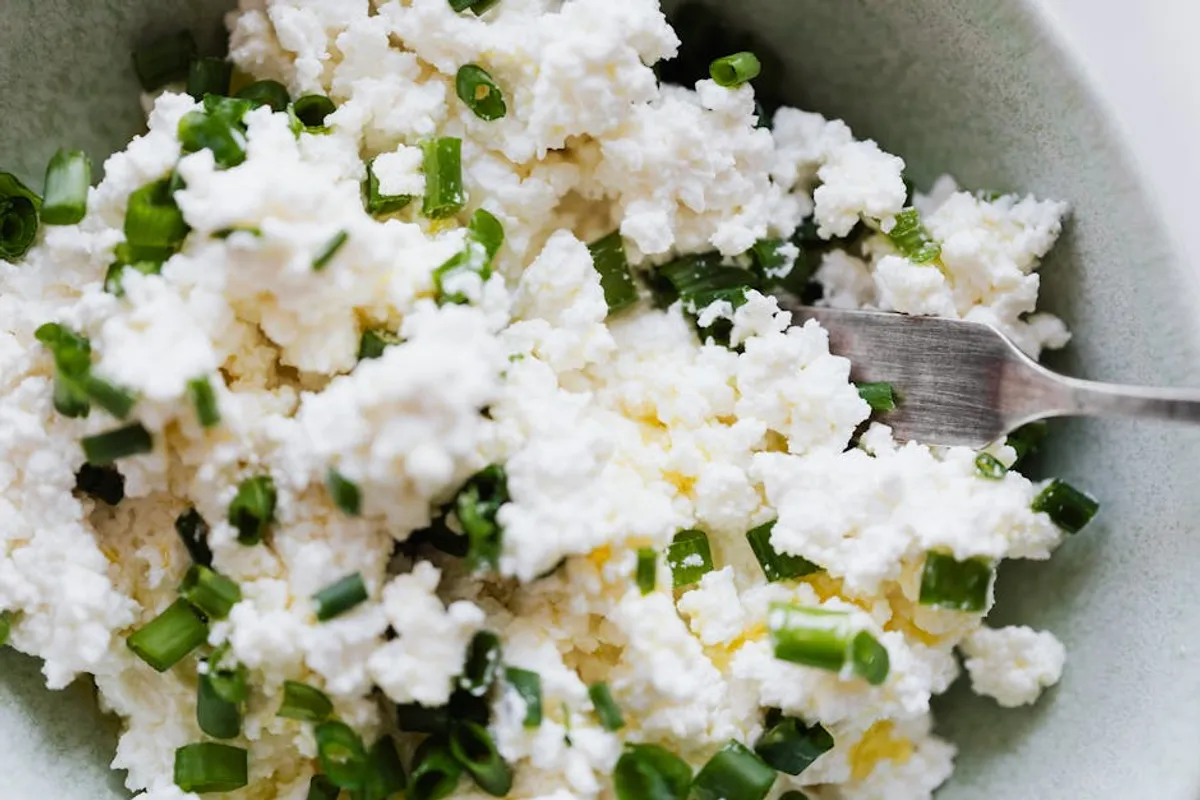
Cottage cheese bread offers a unique profile in home baking: a tender crumb, a subtle tang, and an often-touted protein boost. Achieving optimal results, however, moves beyond simply combining ingredients. The nuances of selection, technique, and temperature significantly impact the final loaf, influencing everything from texture and rise to overall flavor. This guide details precise approaches to master cottage cheese bread, identifies common missteps that lead to suboptimal outcomes, and explores a range of variations to expand its culinary applications, ensuring each bake meets specific preferences and dietary needs.
Tips for Perfect Cottage Cheese Bread
Ingredient Selection
The foundation of exceptional cottage cheese bread begins with deliberate ingredient choices. Opt for full-fat cottage cheese (4% milkfat) over lower-fat alternatives. The higher fat content contributes essential moisture and richness, resulting in a more tender crumb and a less dry loaf. Lower-fat versions can lead to a denser, drier texture and may require adjustments to liquid ratios. For flour, a good quality unbleached all-purpose flour provides reliable structure, but consider blending in a small percentage of bread flour (10-20%) for a chewier texture and improved rise, thanks to its higher protein content.
Best for: Achieving a consistently moist and flavorful loaf.
Mixing and Kneading Techniques
Proper integration of ingredients is crucial. Begin by gently folding the cottage cheese into the wet ingredients before combining with the dry. This prevents over-mixing the curds, which can break them down excessively and diminish their textural contribution to the final bread. Kneading time is also critical; aim for a dough that is smooth, elastic, and passes the windowpane test, indicating sufficient gluten development. Over-kneading can toughen the bread, while under-kneading results in a dense, crumbly texture. Adjust kneading time based on flour type and ambient humidity, typically 8-12 minutes by hand or 6-8 minutes in a stand mixer.
Proofing Considerations
Proofing is the stage where yeast ferments, producing carbon dioxide that gives bread its rise and airy texture. Maintain a warm, draft-free environment (75-85°F / 24-29°C) for optimal yeast activity. The first proof (bulk fermentation) should allow the dough to double in size, usually 1-1.5 hours depending on yeast activity and temperature. The second proof (final proof in the loaf pan) should see the dough nearly double again, reaching just above the rim of the pan. Under-proofing leads to a dense, heavy loaf, while over-proofing can cause the dough to collapse in the oven, resulting in a flat, coarse-textured bread.
Baking for Texture
Preheating your oven thoroughly is non-negotiable for consistent baking. A properly preheated oven ensures a strong initial "oven spring," where the dough undergoes a rapid rise before the crust sets. Bake cottage cheese bread at a moderate temperature, typically 350-375°F (175-190°C), for 30-40 minutes, or until the internal temperature reaches 200-210°F (93-99°C). For a crispier crust, consider placing a pan of hot water on the bottom rack during the first 10-15 minutes of baking to create steam. This delays crust formation, allowing for greater expansion.
Common Mistakes and How to Avoid Them
Over-processing the Cottage Cheese
A frequent error is blending or mashing the cottage cheese too thoroughly before incorporation. The small curds in cottage cheese contribute pockets of moisture and a distinct, tender texture to the final bread. When over-processed, these curds break down, releasing excess moisture into the dough prematurely and potentially leading to a denser, gummier crumb structure. To avoid this, gently fold in the cottage cheese as is, or with minimal mashing if a smoother texture is desired, ensuring some curd integrity remains.
Incorrect Moisture Balance
Dough hydration is critical. Too much liquid results in a sticky, unmanageable dough that struggles to hold its shape and can produce a dense, wet interior. Too little liquid yields a stiff, dry dough that is difficult to knead and bakes into a crumbly, dry loaf. Cottage cheese itself contributes significant moisture, so adjust other liquid components (milk, water) carefully. Start with the lower end of the liquid recommendation and add more gradually, spoonful by spoonful, until the dough reaches a soft, pliable consistency that is tacky but not overly sticky.
Under-proofing or Over-proofing
Both under-proofing and over-proofing compromise the bread's structure and texture. An under-proofed loaf will be dense and heavy with a tight crumb, as the yeast hasn't produced enough gas to create an open structure. An over-proofed loaf, conversely, will often collapse during baking or have a coarse, crumbly texture with large, irregular holes, as the gluten structure has weakened and can no longer hold the gas. Monitor the dough closely; it should be visibly expanded and feel light and airy. The "poke test"—gently pressing a floured finger into the dough—can indicate readiness: if the indentation slowly springs back, it's ready; if it springs back quickly, it needs more time; if it stays indented, it's likely over-proofed.
Baking at the Wrong Temperature
An oven that is too cool will result in a pale, dense loaf with poor oven spring because the yeast activity slows down too quickly, and the crust sets too slowly. An oven that is too hot will cause the crust to brown too rapidly, potentially burning, while the interior remains undercooked or dense. Always preheat your oven for at least 20-30 minutes beyond the indicated temperature setting to ensure it has reached and stabilized at the correct heat. Using an oven thermometer provides an accurate reading, compensating for any calibration discrepancies in your oven's thermostat.
Pro Tip: For a richer flavor and enhanced browning, brush the top of your cottage cheese bread with an egg wash (one egg whisked with a tablespoon of water or milk) just before baking. This also helps any toppings, like sesame seeds or oats, adhere better to the crust.
Creative Variations for Cottage Cheese Bread
Savory Additions
Cottage cheese bread's mild tang makes it an excellent base for savory enhancements. Consider incorporating:
- Herbs and Garlic: Mix in 2-3 tablespoons of finely chopped fresh rosemary, thyme, or chives, along with 1-2 cloves of minced garlic, for an aromatic loaf perfect with dinner.
- Cheese and Onion: Add 1/2 cup of shredded sharp cheddar or Gruyère cheese and 1/4 cup of finely diced caramelized onions for a more robust flavor profile.
- Sun-Dried Tomatoes and Olives: Fold in 1/4 cup of chopped oil-packed sun-dried tomatoes and 1/4 cup of pitted, chopped Kalamata olives for a Mediterranean-inspired bread.
Sweet Adaptations
While less common, cottage cheese bread can be adapted for sweet applications. Reduce the salt slightly and incorporate:
- Cinnamon Swirl: After the first proof, roll out the dough, spread with a mixture of melted butter, cinnamon, and brown sugar, then roll up and bake.
- Dried Fruit and Nuts: Add 1/2 cup of dried cranberries, raisins, or chopped apricots, along with 1/4 cup of chopped walnuts or pecans, for a breakfast-friendly loaf.
Gluten-Free and Low-Carb Options
Adapting cottage cheese bread for specific dietary needs is achievable with flour substitutions. For gluten-free versions, use a high-quality gluten-free all-purpose flour blend that contains xanthan gum for structure. Expect a slightly different texture and potentially less rise. For low-carb variations, almond flour or coconut flour can be used, but these flours behave very differently from wheat flour and require significant adjustments to liquid ratios and often the addition of binders like psyllium husk powder to achieve a workable dough and acceptable texture.
Optimizing Your Cottage Cheese Bread Bakes
Mastering cottage cheese bread hinges on understanding ingredient interactions and precise technique. By selecting full-fat cottage cheese, ensuring proper gluten development through careful kneading, and meticulously managing proofing times, bakers can consistently achieve a tender, well-risen loaf. Avoiding common pitfalls like over-processing the curds or baking at incorrect temperatures will prevent dense or dry results. Experimenting with savory or sweet additions, or adapting recipes for dietary needs, expands the versatility of this unique bread. Each successful bake reinforces the value of attention to detail, transforming a simple recipe into a consistently rewarding culinary experience.
Frequently Asked Questions
Can I use low-fat cottage cheese?
While possible, full-fat cottage cheese is recommended for its superior moisture, richness, and contribution to a tender crumb. Low-fat versions can result in a drier, denser loaf and may require additional liquid or fat. If used, monitor dough consistency closely.
How should I store cottage cheese bread?
Store cooled cottage cheese bread at room temperature in an airtight container or a bread bag for up to 3-4 days. For longer storage, slice the bread and freeze it in a freezer-safe bag for up to 2-3 months. Thaw slices as needed.
Can I make this bread in a bread machine?
Yes, cottage cheese bread can often be made in a bread machine using the "basic" or "white bread" cycle. Adjust liquid amounts as necessary to achieve the correct dough consistency, as bread machine recipes sometimes require slightly different hydration levels.
What can I serve with cottage cheese bread?
Its mild, slightly tangy flavor makes it versatile. It pairs well with savory dishes like soups, stews, and roasted meats. It can also be served with butter, jam, or used for sandwiches. Savory variations are excellent with cheese boards or as an accompaniment to salads.